Uncategorized
How to Organise Festival Seating Without Bottlenecks

A full seating area can turn from a crowd-management asset into a pinch point in minutes. Knowing how to organise festival seating means planning for more than chair numbers: you need clear sightlines, safe access, weather protection, accessible positions and enough flexibility to keep the event moving when conditions change.
Festival seating should support the programme, not compete with it. Whether you are planning a community concert, school event, food and wine festival, outdoor cinema or council celebration, the right setup gives guests a comfortable place to stay longer while allowing staff, performers and emergency services to work safely.
Start with the audience, not the chair count
The first question is not how many chairs will fit on the site. It is how many people are likely to sit down at the same time, and why. A headline act, awards presentation or ticketed performance usually needs a defined seating capacity. A day-long community festival may only need enough seating for families, older attendees and people taking a break between activities.
Review expected attendance, programme peaks and the likely length of each performance. If 1,500 people are expected across the day but only 400 will watch the main stage at one time, a 400-seat viewing area may be appropriate. If seating is first come, first served, allow for turnover and avoid presenting it as reserved unless you have a system to manage reservations.
Audience mix matters just as much. Family events need room for prams and carers. Corporate events may require more formal, aligned rows. Food-focused festivals benefit from casual table settings close to vendors, with separate viewing seating for entertainment. Tiered seating can be a practical option where sightlines are limited or a compact footprint needs to accommodate more guests.
Map the festival seating zone before selecting equipment
A site plan is the foundation of a workable seating layout. Mark fixed elements first: the stage, power routes, food stalls, bar areas, amenities, entry points, exits, first aid, production compounds and emergency vehicle access. Seating then needs to fit around those operational requirements.
Place the main audience area where guests can see and hear comfortably, but do not position it directly in front of a service route or close to noisy generators. Consider sun direction for daytime events. Guests facing west in late afternoon may struggle with glare, while unshaded chairs can become uncomfortable during a long programme. Marquees, umbrellas and shaded rest zones can improve comfort, but they must be positioned so they do not block viewing areas or pedestrian routes.
Ground conditions are equally important. Chairs placed on uneven grass, loose gravel or sloping ground can be uncomfortable and difficult to manage. Flooring may be needed for formal areas, walkways, accessible seating zones or ground that is likely to become muddy. For public events, inspect the site after rain as well as in dry conditions. The plan that works on a sunny site visit may not work after a wet week.
Allow space for movement and emergency access
Rows need aisles. Seating blocks need clear entry and exit paths. The surrounding area needs circulation space for guests who are not seated. These allowances are where many layouts fall short.
Avoid creating one large block with a single narrow way in and out. Divide bigger audiences into manageable sections with aisles that lead towards open circulation areas. Keep exits obvious and free of signs, bins, cables, furniture and queues. Your final layout should also preserve the access routes required by the venue, council, emergency services and event risk plan.
Do not rely on guests to keep routes clear once an event is underway. Use barriers, picket fencing, event flags or clear signage to define seating boundaries and guide the crowd towards the right entry points. This reduces confusion at peak times and helps staff identify when an area has reached capacity.
Choose seating that suits the festival format
The best seating hire depends on the event experience you are creating. Folding chairs are practical for large audiences because they are quick to place in rows, easy to reconfigure and suitable for performances, ceremonies and presentations. For a more relaxed atmosphere, combine chairs with wine barrels, dry bars and casual lounge-style settings in designated social areas.
Tables and chairs work well near food and beverage vendors, but they should not be treated as a substitute for audience seating. Dining guests tend to occupy tables for longer, particularly when shade is available. Plan the number of tables around expected dwell time, food service style and cleaning capacity, rather than simply filling spare space.
Tiered seating provides elevated viewing where a flat site would leave people looking at the backs of others’ heads. It is especially useful for music, speeches, demonstrations and screen-based programming. However, it requires proper positioning, safe access, suitable ground preparation and a clear operational plan. It should be supplied and installed by an experienced event provider, not improvised with temporary furniture.
For covered zones, ensure the marquee or shelter size accounts for chairs, aisles and accessible spaces, not just the seated footprint. A crowded covered area can become hot and difficult to enter or exit. Good ventilation, sensible spacing and multiple access points make a real difference.
Build accessibility into the layout from the beginning
Accessible seating should be integrated into the event plan, not added after the general audience area is installed. Provide stable, level locations with clear paths from arrival points, suitable sightlines and room for companions. Wheelchair spaces need to be positioned so guests are not left at the very back or forced into busy circulation routes.
Consider the full guest journey. Can a person using a mobility aid move from parking or drop-off to the seating area without crossing rough ground, steep slopes or crowded food queues? Are accessible toilets nearby? Is there an alternative route if the main path becomes congested? These details affect safety, dignity and the overall guest experience.
Where possible, include seating with backs and arms for guests who need additional support. A mix of seating types is often more useful than one uniform setup, particularly at public events with a broad age range.
Plan for queues, changeovers and late arrivals
The most effective festival seating plan accounts for what happens between acts. Guests leave, others arrive, rubbish builds up and staff need room to reset the area. If changeovers are short, keep the seating layout simple enough for quick checks and cleaning without moving large amounts of furniture.
For ticketed or high-demand sessions, establish how seating will been filled and monitored. A managed entry point can prevent people from saving large blocks of chairs or standing in aisles. If an area reaches capacity, staff need a clear message and a nearby alternative, such as a screen viewing area, standing zone or later session.
Allow enough room around the perimeter for event staff to move without cutting through rows. This is useful for assisting guests, removing hazards, responding to spills and directing people during an evacuation. It also helps performers and technical crews avoid audience congestion when moving between backstage and operational areas.
Prepare for weather and after-dark conditions
Outdoor seating is exposed to the elements, so build contingencies into the hire order and site plan. Shade is valuable in summer, but avoid creating covered areas that collect heat or obstruct airflow. In wet weather, a combination of marquees, flooring and covered walkways can protect key guest areas and reduce damage to the site.
When the programme runs into the evening, lighting becomes an essential safety requirement. Guests need to see aisles, steps, pathways, exits and changes in ground level. Lighting should assist movement without shining directly into the audience or interfering with the stage experience. Clearly lit signage and staff positioned at key access points will help late arrivals find seats with minimal disruption.
Wind also needs consideration. Secure signage, umbrellas and temporary structures correctly, and have a process for closing or adjusting exposed areas if conditions deteriorate. Equipment selection should always reflect the venue, forecast and event operating plan.
Work from one coordinated equipment plan
Festival seating rarely stands alone. It connects to staging, flooring, lighting, marquees, screens, fencing, tables, signage and site operations. Managing these elements through a single coordinated plan reduces clashes on delivery day and makes it easier to confirm that every item fits the available footprint.
Central Coast Party Hire can support seating layouts alongside the wider infrastructure required for community, corporate and public events. Early planning allows equipment quantities, delivery access, installation timing and pack-down requirements to be considered together rather than solved under pressure on event day.
Before finalising the plan, walk the site from a guest’s point of view. Follow the route from entry to seating, sit in the rear rows, check the view from accessible positions and imagine the area at peak capacity. The best festival seating feels straightforward to guests because the operational work has been done well before the first chair is occupied.
Best Crowd Barriers for Events: What to Hire

A barrier placed in the wrong location can create the very bottleneck it was meant to prevent. The best crowd barriers for events are not simply the strongest or tallest option. They are the barriers that suit your crowd numbers, site conditions, entry points and operational plan, while still allowing people to move, queue and exit safely.
For a school fete, that may mean low picket fencing around children’s activities. For a council event or festival, it may involve pedestrian barriers, temporary fencing and controlled vehicle exclusion zones working together. The right approach begins with understanding what each barrier needs to do.
What Crowd Barriers Need to Achieve
Crowd barriers create order in busy spaces. They define where patrons can and cannot go, separate people from vehicles or equipment, protect staff-only areas and guide queues without relying on constant verbal direction from event staff.
At a well-planned event, guests should understand the layout almost immediately. They can see where to enter, where to line up for food, how to access seating and which areas are closed. Barriers support that clarity, particularly when paired with signs, event flags, lighting and visible staff.
The key is to treat barriers as part of the event infrastructure, not an item added at the end of the site plan. A few panels may be enough for a private celebration, but public events require greater consideration of pedestrian flow, emergency access, gates, trip hazards, ground conditions and pack-down access.
The Best Crowd Barriers for Events by Purpose
There is no single best option for every event. The right choice depends on whether you are directing people, securing an area, separating activities or protecting a hazard.
Pedestrian Barriers for Queues and Walkways
Interlocking pedestrian barriers are a practical choice for controlling foot traffic. They are commonly used to form queue lanes at ticket gates, food vendors, bars, toilets and merchandise areas. They can also direct guests along a defined walkway where vehicles, staging equipment or uneven ground need to remain separated from the public.
Their main advantage is flexibility. Sections can be arranged in straight lines, corners and longer runs to suit the site. They are visible, quick to reposition during set-up and generally less intrusive than a solid fence line.
Pedestrian barriers work best when people need guidance rather than complete security. They should not be used as a substitute for an engineered vehicle barrier or a secure perimeter where there is a realistic risk of climbing, forced entry or vehicle impact.
Temporary Fencing for Restricted Areas
Temporary fencing is suited to areas that need firmer separation. Think construction zones during bump-in, generator compounds, waste areas, back-of-house storage, loading zones and locations where public access must be prevented.
For larger public events, temporary fencing can help establish a perimeter and control access through nominated gates. It is also useful when your site needs to be secured overnight. The fencing layout must account for gates, emergency exits, staff access and delivery routes from the outset. Closing off a convenient gate too early can make catering deliveries, staging installation or rubbish removal unnecessarily difficult.
On soft, sloping or exposed ground, fencing needs careful assessment and appropriate stabilisation. Wind, crowd pressure and uneven surfaces all affect how a temporary fence performs. A hire supplier can advise on suitable configurations, but the final plan should always reflect the site and event risk assessment.
Picket Fences for Family and Community Events
Picket fences provide a friendly, clearly defined boundary without making an event feel closed in. They are particularly effective around kids’ activity areas, fete stalls, lawn games, small animal displays, wedding ceremony spaces and entry features.
They are not designed for high-pressure crowd control, but they do an excellent job of creating visual order. At community events, a picket fence can show parents where an activity starts and ends, making supervision easier. Around a food or beverage area, it can help establish a designated zone while retaining an open, welcoming feel.
This option is often as much about presentation as access control. White picket fencing can complement marquees, wine barrels, market stalls and outdoor furniture, especially where the event needs practical boundaries that still suit the overall look.
Stage Barriers and Front-of-House Separation
A stage attracts crowds, equipment, performers and staff into one concentrated area. Barriers at the front and sides of a stage help retain a clear working zone for performers, security and technicians, while keeping the audience at an appropriate distance.
The required set-back depends on the stage height, performer activity, expected crowd density and whether the event has security personnel managing the front-of-house area. A small presentation stage at a corporate event may need only modest separation. A live music program with a standing audience needs a more deliberate plan for audience pressure, access to aisles and emergency egress.
Do not overlook the rear and side access to the stage. Crew need space to move equipment safely, performers need a controlled path on and off stage, and cables should be protected or managed so they do not cross public routes.
Vehicle Exclusion and Service Areas
The highest-risk conflict at many events is not between people and a fence. It is between people and moving vehicles. Deliveries, food vans, plant, waste collection and event vehicles should be separated from public areas wherever possible.
Pedestrian barriers can make a service route more obvious, but they are not necessarily suitable for stopping a vehicle. If vehicle access needs to be managed, assess the risk with the venue, council, traffic provider or event safety adviser. The solution may require traffic management measures, controlled access times, trained marshals or purpose-built vehicle mitigation equipment.
A sound operational rule is to complete as much vehicle movement as possible before gates open. Where vehicles must enter during an event, use a controlled route with a clear exclusion area and staff supervision.
Plan Barrier Layouts Around Movement, Not Just Boundaries
The most effective barrier plan follows how people will actually use the site. Start with the expected arrival point, then map the natural path to ticketing, information, food, seating, toilets, activities and exits. Look for locations where people may stop suddenly, gather in groups or cross paths.
Queues need more room than organisers often allow. A food stall may look quiet at midday but become a pinch point after a performance finishes or when weather shifts patrons under cover. Provide queue lanes that do not block primary walkways, accessible paths or emergency exits.
Leave practical gaps for prams, wheelchairs, mobility scooters and staff access. A barrier line that looks tidy on paper can be difficult to use if gates are too narrow or located away from the natural direction of travel. Accessible routes should remain clear, firm where possible and easy to identify.
It also pays to avoid creating dead ends. If guests enter a fenced area, they should be able to leave without pushing back through an incoming crowd. This is particularly relevant around bars, food courts, children’s attractions and enclosed entertainment zones.
Match the Hire Quantity to the Site
Barrier quantities are best calculated from a site plan, not guessed from attendance numbers alone. A 500-person outdoor event spread across a large oval may require less crowd control infrastructure than a 150-person function in a compact venue with one entry and a narrow corridor.
Measure the runs you need, including queue lanes, side returns and gates. Allow for overlap or connections between sections, as well as any changes in direction. Identify where barriers need feet or stabilisers and ensure those bases will not obstruct pathways.
Consider the full event timeline too. You may need temporary fencing during bump-in to separate contractors from early arrivals, then pedestrian barriers once gates open. Pack-down has its own risks, particularly if guests are still leaving while vehicles are waiting to enter the site.
Central Coast Party Hire can coordinate crowd-control equipment alongside marquees, staging, flooring, seating, lighting and event support, reducing the risk of separate suppliers working from conflicting site plans.
Safety Checks Before Guests Arrive
Once barriers are installed, walk the site as a guest would. Check that lines are straight and connected, gates operate properly, bases are stable and there are no sharp edges or protrusions near pedestrian routes. Confirm that signs are visible from the direction patrons approach.
Pay close attention to emergency exits. They must remain clearly marked, unobstructed and usable throughout the event. Do not use barriers to create a queue that spills across an exit route, even for a short period.
If conditions change, adapt. Rain can concentrate guests under marquees, strong winds can affect temporary structures, and a popular act can shift crowd density towards the stage. Assign someone on the event team to monitor pressure points and make sensible adjustments before a small issue becomes a disruption.
The best barrier plan gives guests clear direction without making them feel managed at every turn. When barriers, signage, staff and site layout are working together, people move where they need to go, restricted areas stay protected and your team can focus on running the event rather than constantly correcting the crowd.
Best Event Seating Layout Ideas That Work
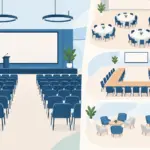
A beautifully dressed marquee can still fail if guests cannot see the stage, queues cut across tables or chairs are packed too tightly to move. The best event seating layout ideas begin with how people will arrive, gather, eat, watch and leave – not simply how many chairs fit into a space.
For private celebrations, corporate functions and large community events, seating needs to support the programme, venue conditions and service plan. A practical layout protects guest comfort while giving caterers, presenters, accessibility needs and emergency access the room they require.
Best event seating layout ideas start with purpose
Before choosing tables or placing a single chair, define the event’s main activity. A presentation needs clear sightlines. A gala dinner needs table service routes. A school fete may need casual places for families to rest while keeping pathways open to stalls and attractions. Trying to make one layout do every job often creates congestion.
Start with the expected attendance, then work backwards from the usable event area. Usable space is not the full marquee, hall, park or forecourt footprint. It excludes staging, catering areas, dance floors, entrances, AV control, toilets, emergency exits and any space required for accessible movement. Outdoor sites also need allowance for uneven ground, weather protection and vehicle access during bump-in and pack-down.
The right seating plan balances capacity with comfort. Packing in extra chairs can increase a guest count on paper, but it may slow service, make people reluctant to move and create a poor experience once the room is full.
Choose a layout that matches the event format
Theatre seating for presentations and ceremonies
Theatre-style seating uses rows of chairs facing a stage, screen or focal point. It is usually the most efficient option where the audience is there to listen, watch or take part in a formal ceremony. It suits conferences, award presentations, school assemblies, outdoor performances and wedding ceremonies.
A centre aisle can work well for a processional or presenter access, while side aisles make it easier for guests to enter and exit without stepping over rows. In a wider space, split seating blocks with clear aisles rather than creating very long rows. This improves access and gives event staff more room to assist guests.
The trade-off is that theatre seating does not encourage conversation or provide surfaces for food and drinks. If the event moves into catering afterwards, allow a separate dining or cocktail zone rather than expecting guests to balance plates in their laps.
Cabaret seating for workshops and awards nights
Cabaret layouts use round tables directed towards a stage, often with chairs placed around part of each table to preserve the view. They are a strong choice for conferences with meals, fundraising dinners, training sessions and award nights where guests need to talk as well as watch.
The key consideration is sightline quality. Tables closest to the stage can sit fully around the table, but tables further back may need open sides facing the presentation area. Avoid placing guests with their backs to the stage for long periods, particularly where speeches, screens or entertainment are central to the programme.
Round tables create a more social atmosphere than rows, but they use more floor space. If numbers are tight, confirm whether the priority is maximum capacity or a comfortable dining experience before finalising quantities.
Banquet seating for shared meals and celebrations
Long trestle tables, banquet tables or a mix of both suit weddings, milestone birthdays, community dinners and catered celebrations. This format creates a generous, communal feel and can make effective use of a long marquee or narrow venue.
For a formal meal, leave enough space behind each chair for guests and service staff to pass. Table ends also need clearance, especially if platters, wine service or mobility aids are part of the plan. A central aisle can become a natural route for bridal parties, speeches or entertainment, provided it is not blocked by gift tables, décor or queues at the bar.
Banquet seating is visually effective, but it needs careful table planning. Very long runs can make it harder for guests to reach their seats and for caterers to serve efficiently. Breaking the layout into shorter table groups can improve circulation without losing the shared-table effect.
U-shaped and boardroom seating for discussion
For meetings, planning days and smaller training sessions, U-shaped or boardroom seating puts conversation ahead of capacity. Everyone can see one another, presenters can move through the centre, and documents or laptops have a stable surface.
A U-shape is particularly useful when demonstrations, group discussion or a facilitator-led session is planned. Boardroom seating works best for smaller groups where every attendee is expected to contribute. Neither is an efficient choice for a large audience, so it is worth moving to theatre seating once attendance grows beyond the point where discussion can remain practical.
Classroom seating for learning sessions
Classroom-style layouts pair tables with forward-facing chairs. They suit compliance training, exams, product demonstrations and workshops requiring note-taking or laptops. Guests have personal work space, while the facilitator retains a clear focal point at the front.
This layout requires more space per person than theatre seating. Build in breaks between table rows so attendees can leave without disrupting the whole room, and position power, screens and equipment before tables are locked into place. A rushed adjustment on event day is far harder once chairs, flooring and AV are installed.
Cocktail and lounge seating for flexible events
Not every event needs a seat for every guest. Cocktail layouts use bar tables, stools, wine barrels, lounges and occasional chairs to create an active, informal setting. They work well for launches, networking events, festival hospitality areas and celebrations with short speeches or roaming catering.
Even in a standing event, provide enough seats for older guests, families, guests with disability and anyone needing a break. Place lounge areas away from busy service points so they feel like a retreat rather than an obstacle. If a formal presentation is planned, create a defined viewing zone with enough chairs for priority guests.
Plan circulation before filling the room
A good seating layout has clear routes that remain clear when guests arrive with bags, prams, drinks and plates. Entry points should lead naturally into the event rather than depositing people behind a row of chairs. Bar, food and registration queues need their own space so they do not spill across main aisles.
Keep the route between catering, kitchen facilities and dining tables direct. For outdoor events, consider how equipment will be delivered, where rubbish will be collected and whether wet weather changes the entrance or queue location. Flooring can improve comfort and stability, particularly under marquees, but its edges and transitions must be planned around access routes.
Accessibility should be built into the first plan, not added as a last-minute adjustment. Allow suitable wheelchair positions with equivalent views, accessible paths to key areas, and seating locations that do not isolate guests from their group. Maintain required emergency exits and access at all times, and check venue or council requirements for public events.
Use focal points to make the room feel organised
Guests should be able to identify where to look within seconds of entering. A stage, screen, dance floor, ceremony arbour or central dining arrangement gives the layout purpose. Seating then supports that focal point instead of competing with it.
For a stage programme, check views from the back corners and behind structural marquee poles before committing to table placement. Tiered seating may be the better option where viewing is critical and the site allows it. Lighting also matters: presenters need to be visible, but diners and audience members should not be staring into glare.
At larger events, use practical visual cues to separate zones. Picket fencing can define family areas or queue lines, while flags, signage and lighting help guests find entrances, amenities and activity areas without relying on staff directions all night.
Build the layout around event-day operations
The best plan is one your team can actually install, service and pack down safely. Confirm delivery access, ground conditions, set-up timing and whether furniture needs to move between event phases. A ceremony layout that converts into dining or a conference room that changes into an awards dinner can save space, but only if there is enough labour and time for the reset.
Central Coast Party Hire can coordinate seating, tables, marquees, staging, flooring, lighting and event infrastructure as one practical plan. Working from a site layout and run sheet helps identify pinch points before trucks arrive, rather than solving them while guests are at the gate.
The most effective seating arrangement is not always the one with the highest chair count or the most elaborate styling. It is the one that lets guests settle in, move easily and focus on why they came. Start with the experience you need to deliver, then give every chair, table and aisle a clear job.
Wine Barrel Hire for Wedding Setups That Work

A wine barrel can do more than fill an empty corner at a reception. Used well, it creates a useful surface for drinks, florals, signage or food service while bringing warmth and structure to an outdoor or rustic venue. Wine barrel hire for a wedding works best when barrels are planned as part of the event layout, not added as a last-minute styling extra.
For couples, venues and wedding planners across the Central Coast, the practical questions matter just as much as the look. How many barrels are needed? Where will guests naturally gather? Will the surface be protected from drinks and weather? And how will the barrels work with tables, chairs, lighting and flooring? Getting these details right makes the setup feel considered and keeps service moving on the day.
Start with the job each wine barrel needs to do
Wine barrels are highly adaptable, but each one should have a clear purpose. A barrel at the ceremony entrance might support a welcome sign or an arrangement of flowers. Near the bar, it can hold water dispensers, a grazing display or a cocktail menu. In a lounge area, a barrel paired with a round tabletop becomes a relaxed stand-up drinks table.
Avoid placing barrels simply because there is space to fill. A collection of unused barrels can make a venue feel crowded, particularly in a marquee, barn or smaller function room. Instead, use them to define key moments in the guest journey: arrival, ceremony, bar service, dining, dancing and departure.
For a more polished result, repeat the same styling treatment across the event. Matching florals, timber signs, candles in suitable holders or linen runners can tie the barrels into the overall colour scheme without hiding their natural character. If the wedding is modern rather than rustic, keep the styling restrained and use barrels as a textural contrast against clean furniture and lighting.
Wine barrel hire wedding quantities depend on layout
There is no single barrel count that suits every wedding. The right quantity depends on guest numbers, venue size and whether the barrels are decorative, functional or both. A small ceremony may only need two barrels to frame an aisle or entry. A larger reception with a bar, lounge areas and food stations may use a number of barrels across several zones.
Begin with the areas where a barrel will actively support the event. For example, a 100-person reception might use two at the ceremony point, two at the entry, several around a cocktail area and a small number beside the bar or catering station. This is usually more effective than lining barrels around the perimeter of the venue.
It also depends on the furniture plan. If most guests are seated for a formal meal, barrels may be best reserved for the ceremony, drinks service and styling points. For cocktail-style weddings, barrels can provide valuable standing surfaces throughout the venue. They should be spaced to encourage conversation while leaving clear paths for guests, waitstaff and people using mobility aids.
Match barrels with the rest of the event hire
A wedding setup runs more smoothly when major hire items are coordinated from the outset. Wine barrels are only one part of the picture. Their placement needs to work with tables, chairs, umbrellas or a marquee, lighting, flooring, staging and bar service equipment.
In an outdoor setting, a barrel used for drinks should be close enough to the bar to be practical, but not so close that it creates a bottleneck. A barrel used as a cake or gift table needs a stable, level position away from heavy foot traffic. If it is carrying catering equipment, discuss weight, power access and service requirements with the caterer before finalising the layout.
For events held under a marquee, flooring is worth considering. Barrels are substantial items and need a firm, even base. On grass, uneven ground can affect stability and make glasses or display items harder to manage. Appropriate flooring can improve presentation, provide a safer surface underfoot and give the whole reception a more finished appearance.
Lighting should be planned at the same time. Wine barrels can become hard to see after sunset, especially around garden paths and outdoor bar areas. Festoon lighting, event lighting or carefully positioned lamps can make these areas functional after dark while adding atmosphere. The goal is not to spotlight every barrel, but to ensure guests can safely see surfaces, steps and walkways.
Consider weather, surfaces and guest safety
Outdoor weddings on the Central Coast can move quickly from bright sunshine to wind or rain. A timber barrel is durable, but the items placed on it may not be. Paper signage, candles, floral arrangements, glassware and food displays all need protection or a backup location.
If barrels are being used in exposed areas, position them where they are less likely to be bumped by wind, passing guests or suppliers moving equipment. Keep them clear of vehicle access, catering routes and emergency exits. Do not rely on a barrel as a barrier or crowd-control item – use suitable fencing or event infrastructure where separation is required.
Surface protection is another practical consideration. A barrel’s top is part of its appeal, but repeated spills, condensation from ice buckets or heavy decorative items can create marks or instability. Trays, runners and secure display stands help protect the surface and keep drinks, menus and styling items organised.
For candle styling, use enclosed holders and follow venue requirements. Open flames may be restricted in marquees, bushland locations or venues with specific fire safety rules. Battery-operated candles often provide the same visual effect with fewer operational concerns.
Use barrels to improve, not interrupt, service
The best wedding styling supports the event rather than getting in the way of it. Wine barrels can help service teams by creating landing points for water stations, napkins, menus or self-serve refreshments. They can also create clear visual cues for guests, such as where to find cards and gifts, blankets for a cool evening or a late-night snack station.
However, a barrel should not replace a properly sized bar, catering table or registration point when guest numbers require more capacity. For a large wedding, one barrel holding water dispensers may lead to queues and spills. In that case, a longer service table or multiple stations is the better operational choice, with barrels used to complement the arrangement.
Think about access from both sides. Guests need room to approach, collect a drink or read a sign, then move away without stopping the flow. Caterers and bar staff also need clear access to replenish supplies. A simple site plan prepared before delivery can prevent last-minute repositioning when the venue is already busy.
Plan delivery, placement and pack-down early
Wine barrels are not lightweight decorative props. Delivery access, loading zones, stairs, narrow gates and soft ground all affect where they can be placed and how efficiently setup can be completed. Confirm these details before finalising your hire order, particularly for private properties and remote ceremony locations.
Provide accurate venue access times and let the hire team know which areas require setup first. If a ceremony is taking place before guests move to the reception, ceremony barrels may need to be positioned and styled well ahead of the remaining furniture. If the same barrels will be moved between spaces, allow time and labour to do this safely.
Central Coast Party Hire can coordinate wine barrels alongside core wedding infrastructure, including marquees, furniture, flooring, lighting and event support. Sourcing these items through one experienced provider reduces the chance of mismatched delivery times, duplicated site visits and gaps in the final layout.
Before the event, walk through the setup from a guest’s perspective. Check that signs are readable, paths remain open, drinks stations are easy to find and every barrel has a clear role. When the hire plan is practical as well as attractive, the barrels become part of a wedding that feels relaxed, organised and ready for guests to enjoy.
Corporate Presentation Equipment Guide for Events

A corporate presentation can be well planned, professionally designed and delivered by the right speaker, then still fall flat because the screen is too small, the sound is unclear or the room layout blocks sightlines. This corporate presentation equipment guide covers the practical infrastructure that helps meetings, conferences, product launches and awards nights run with confidence.
The right setup depends on the audience size, venue conditions, session format and how much interaction is expected. A boardroom briefing has different requirements from a staff conference in a marquee or a public-facing product launch. The goal is not to hire the most equipment. It is to provide clear communication, safe access and a presentation space that works for every person in the room.
Start with the room, audience and run sheet
Equipment decisions should begin before selecting screens or microphones. Confirm the number of attendees, the venue dimensions, ceiling height, available power, ambient light and whether guests will be seated theatre-style, at tables or standing. A screen that works well for 30 people in a dim room may be ineffective for 150 people in a bright function space.
The run sheet matters just as much. Consider who will present, whether speakers will move around the stage, if video content includes sound, and whether audience questions are planned. A keynote with slides needs reliable screen visibility and a presenter microphone. A panel discussion may require multiple microphones, seating, lecterns and a technician to manage changes between speakers.
Allow for the practical parts of the event too. Arrival periods, networking breaks, catering service and awards presentations all affect where equipment can be placed. Cables, speakers and staging should support the event flow without creating trip hazards or cutting off access to exits, catering areas or toilets.
Corporate presentation equipment essentials
Screens and visual display
Screens are the centrepiece of most corporate presentations. Their size and position should be based on the furthest viewer, not the front row. If guests cannot comfortably read key figures, labels and slide headings from the back, the display is undersized.
For larger audiences, two screens can be more effective than one central screen. This is particularly useful in wide rooms, marquee layouts or venues with structural columns. It reduces the need for guests to twist in their seats and gives the presenter a more balanced stage setting.
Screen placement must also account for light. Daytime events near windows, open-sided marquees and outdoor launch spaces can require a brighter display solution, adjusted positioning or shading. Do not assume a standard projection setup will overcome direct sunlight. Where visibility is critical, test the content under actual event conditions before guests arrive.
Audio and microphones
Poor audio is one of the fastest ways to lose a room. Even a small corporate gathering needs sound reinforcement if guests are spread across a large area, seated at tables or affected by venue noise. Audio requirements can include speakers, mixers, lectern microphones, handheld microphones, lapel microphones and headsets.
A handheld microphone suits question time, award announcements and shared speaking roles. Lapel microphones are useful for presenters who need both hands free or want to move naturally across a stage. Headsets can be the better choice for active presenters because they maintain more consistent sound as the speaker turns their head.
There are trade-offs. Wireless microphones give speakers freedom, but they need battery checks, frequency planning and careful coordination. A fixed lectern microphone is simple and dependable, but it keeps the presenter in one position. The best option comes down to the presentation style rather than personal preference alone.
If the presentation contains videos, stings or walk-on music, ensure the audio is routed through the event sound system. Playing video sound through a laptop speaker is rarely adequate, even in a modest room.
Staging, lecterns and presenter furniture
A low stage gives speakers a clear focal point and makes them easier to see over seated guests. It is especially valuable for conferences, town hall meetings, award ceremonies and product announcements. Stage height should suit the room, with safe steps or ramp access where required.
A lectern provides a professional home base for notes, a laptop and fixed microphone setup. It can also help speakers who are less confident on stage. However, a lectern is not always necessary. A panel session or informal leadership update may work better with lounge seating, occasional tables and roaming microphones.
Make sure stage furniture serves the speakers rather than cluttering the set. Water, notes and presentation remotes need somewhere stable to sit. Cables should be secured and routed away from walking paths. If branded backdrops, event flags or display units are part of the setup, leave sufficient space so they frame the presentation without competing with the screen.
Build the setup around sightlines and accessibility
Corporate guests should not have to crane their necks around a pillar, stand to see the screen or strain to hear the speaker. Sightlines are affected by seating layout, screen height, stage position, ceiling supports and decorative elements. A site inspection is the most reliable way to identify these issues early.
The same planning should consider accessibility. Keep clear paths for mobility aids, provide practical access to the stage where speakers require it, and avoid placing equipment where it narrows walkways. Seating positions for guests with hearing or vision needs should be considered before the room fills.
For large events, tiered seating can improve views where space permits. In smaller spaces, a simple change in layout may be enough. Theatre seating directs attention forward, while cabaret-style tables can suit workshops and meals but often need wider screen placement and stronger audio coverage.
Plan for power, cables and content backup
Presentation equipment only performs as well as its power and signal path. Confirm power availability, circuit capacity and outlet locations with the venue. Avoid relying on a single overloaded power point for screens, audio equipment, laptops, charging stations and catering equipment.
Cables should be measured, protected and taped or covered where they cross accessible areas. This is a safety requirement as much as a visual one. Untidy cable runs can also delay bump-in, complicate last-minute changes and make a polished corporate setup look unfinished.
Content backup is equally worthwhile. Presenters should provide final slides in advance where possible, along with any embedded videos, fonts and sound files. Have a copy available on a separate device or drive, and check that the correct aspect ratio displays on the chosen screen. A quick pre-event test can reveal missing video audio, unreadable colours or slides that do not scale correctly.
Allow time for testing, rehearsal and changeovers
A presentation setup should be complete early enough for proper testing. This includes screen visibility from different parts of the room, microphone levels, video playback, presenter clickers and lighting. It also gives speakers an opportunity to practise walking on and off stage, using the microphone and advancing slides.
Rehearsal is particularly useful when several presenters, award recipients or panellists are involved. It clarifies who is responsible for slide changes, where speakers wait, how questions are handled and what happens if a session runs over time. These small operational details make a noticeable difference to the audience experience.
For multi-session events, allow realistic changeover time. A panel can require chairs, microphones and name signage to be reset. A keynote may need a lectern moved into place and a different presentation loaded. Trying to make these changes in seconds usually creates avoidable pressure for staff and speakers.
When professional event support is worth it
For a simple internal meeting, hiring a screen and a microphone may be all that is required. Once an event includes a larger audience, multiple speakers, staging, lighting, formal timing or a challenging venue, coordinated support becomes more valuable. One supplier managing delivery, installation, equipment checks and pack-down reduces the number of moving parts on event day.
Central Coast Party Hire can coordinate presentation infrastructure alongside staging, flooring, seating, lighting, screens and broader event equipment. That is useful when a corporate event needs more than audiovisual gear and the organiser wants one practical point of contact for the full site setup.
The most effective presentation equipment is rarely the most elaborate. It is the equipment that suits the room, supports the agenda and lets every guest see, hear and engage without distraction. Plan it early, test it properly and give presenters a setup they can rely on when the room is watching.
Outdoor Event Shelter Options for Any Event

A sunny forecast is useful, but it is not an event plan. The right outdoor event shelter options protect guests, food, equipment and schedules when conditions change, while giving the site a clear, professional layout. The best choice depends on your guest numbers, activity, venue access, ground surface and how long the structure needs to be in place.
For a backyard celebration, a simple covered area may be enough. For a school fete, corporate function or public festival, shelter becomes part of the event infrastructure. It needs to manage crowd flow, allow suppliers to work safely and provide a reliable contingency if wind, rain or heat arrives.
Start with the job the shelter needs to do
Before choosing a structure, decide what must sit underneath it. Dining areas, ceremony spaces, bars, catering stations, registration desks, performers, exhibitors and equipment all have different space and access requirements.
A shelter for seated dining needs room for tables, chairs, serving paths and guests moving between them. A covered stage needs height, clear sightlines and protection for audio-visual equipment. A festival information point may only require a compact, highly visible structure with room for staff and signage.
Think beyond the peak guest count. A 100-person event does not necessarily need shelter for all 100 people at once, but it does need enough covered capacity for the key moments. If speeches, meals or presentations cannot move indoors, plan the shelter around the number of people who must remain comfortable and operational during poor weather.
Outdoor event shelter options for different setups
Marquees for flexible, weather-ready coverage
A marquee is often the most adaptable option for weddings, private functions, corporate events and community gatherings. It can be sized to suit the site and configured around dining, a dance floor, a bar or a presentation area. Sidewalls can provide further protection from wind and rain, while clear roof or window sections can retain natural light where appropriate.
Marquees work particularly well when there is no suitable indoor venue or when the event needs a purpose-built footprint. They also give organisers more control over the guest experience. Flooring, lighting, furniture, staging and heating can be planned as one coordinated setup rather than added as separate afterthoughts.
The trade-off is that marquees require proper site assessment. The team needs to consider access for vehicles, overhead obstructions, underground services, ground slope, anchoring requirements and enough time for installation and pack-down. Larger structures may also need council or venue approval.
Pop-up gazebos for compact activity zones
Pop-up gazebos are practical for smaller covered areas that need to be deployed efficiently. They suit market stalls, school events, sports days, registration points, first aid stations, merchandise areas and small food service zones.
They are not a substitute for a large marquee when guests need extended weather protection or formal seating. However, several gazebos can create a useful event precinct, separating vendors, activities and support services without making the site feel closed in.
Placement matters. Position gazebos so queues do not block paths, emergency access remains open and guests can see where to go next. If the event is exposed to wind, ensure the structure is appropriately secured for the conditions and site.
Umbrellas for shade where people pause
Market umbrellas are a straightforward solution for outdoor dining, cocktail settings and casual seating areas. They provide targeted shade without changing the open-air feel of the event, making them a strong choice for daytime functions in warmer months.
Umbrellas are best used as part of a broader comfort plan. They can shade tables, lounge areas or food stations, but they offer limited protection in driving rain or gusty conditions. If weather cover is essential, pair them with a marquee or another enclosed shelter option.
Pagodas and feature shelters for defined spaces
Smaller formal shelters, including pagoda-style structures, can help define an entrance, bar, ceremony point or VIP space. They create a clear destination within a larger event site and can be especially useful where a full marquee would be excessive.
For corporate activations and public events, these structures can also separate operational functions from guest areas. A covered check-in point, organiser hub or sponsor space improves visibility and keeps staff working effectively during changing weather.
Covered stages for performances and presentations
When entertainment, speeches or presentations are central to the programme, the stage shelter deserves the same attention as guest cover. Musicians, presenters and technical operators need protection from rain and direct sun, as do sound desks, screens and cables.
A mobile truck stage may suit a public event that needs fast setup, elevation and a professional performance platform. For other formats, staging under a marquee can create a controlled presentation space. The right arrangement depends on audience size, viewing angles, power needs, bump-in access and whether the event runs after dark.
Plan for weather, not just rain
Rain is the obvious reason to hire shelter, but heat, wind and cold can affect an event just as quickly. A structure that works well in a light shower may become uncomfortable in high temperatures if airflow is restricted. Conversely, an open-sided setup may be pleasant in still weather but unsuitable on an exposed coastal site.
Consider which sides need to remain open for views and ventilation, and which may need walls or weighted protection. Ask how water will drain away from entrances and whether guests can move from parking, amenities and catering areas without crossing wet or muddy ground.
For summer events, shade should cover the places guests spend time, not only the places they pass through. For evening and winter events, flooring, lighting and heating can make the difference between a space that is merely covered and one people are happy to use.
Flooring turns temporary cover into an event space
A shelter on grass can be suitable for a relaxed daytime gathering, provided the ground is firm and level. For formal dining, exhibitions, high heels, mobility access or wet-weather conditions, flooring is often essential.
Flooring creates a more stable surface for furniture, protects lawn areas and reduces the chance of mud being carried through the event. It also helps define the space visually, particularly under a marquee. If the site has uneven ground, discuss this early, as levelling and access solutions may affect the structure choice and installation plan.
Do not overlook transitions between surfaces. Guests using prams, wheelchairs or mobility aids need practical access from paths and parking areas into covered spaces. Cables, matting and thresholds should be managed so they do not become trip hazards.
Size the shelter around layout and movement
Shelter sizing is not simply a square-metre calculation. A well-sized structure allows people to arrive, circulate, sit, queue and leave without congestion. This is particularly important for events with food service, displays or staggered activities.
Start with the furniture layout, then allow for aisles and service areas. Round tables generally need more circulation room than theatre-style seating. A cocktail event may accommodate more guests under the same footprint, but it still needs enough seating, shade and space around the bar.
For public events, separate guest spaces from operational areas. Caterers need room for preparation and deliveries. Event staff need a sheltered base. Equipment storage, rubbish collection and back-of-house access should not interfere with the public experience.
Check the site before locking anything in
The most suitable shelter on paper can become impractical if access is restricted or the ground cannot support the installation. A proper site review should cover vehicle entry, gates, turning space, surface condition, slopes, trees, powerlines, drainage and nearby buildings.
It is also worth confirming venue rules early. Parks, schools, sporting grounds and council-managed spaces may have requirements for approvals, public liability documentation, pegging, ballast, noise and operating times. A venue may also specify where vehicles can travel or where structures can be placed.
For large events, the shelter plan should sit alongside the broader site plan. Consider emergency exits, first aid, fire safety, crowd routes, security points and weather response procedures. Shelter should support safe operations rather than create bottlenecks or blind spots.
Coordinate shelter with the rest of the hire plan
The strongest result comes from planning shelter alongside the equipment that will sit within and around it. Tables, chairs, lighting, staging, screens, fencing, catering equipment and power all affect the space required and the order of installation.
Working with one event partner can reduce handovers and prevent common problems, such as furniture arriving before flooring is laid or lighting being planned without suitable fixing points. Central Coast Party Hire can coordinate shelter, event equipment and operational support so the setup is considered as one working site.
Allow adequate time for installation before suppliers arrive and for pack-down after guests leave. Rushing either stage creates unnecessary pressure, particularly when a larger structure, flooring or staged equipment is involved.
A good outdoor shelter does more than respond to a forecast. It gives your event a dependable base, keeps essential operations moving and gives guests a comfortable place to gather, whatever the day brings.
A Corporate Event Logistics Example That Works

A well-run corporate function is rarely remembered for its loading dock schedule, power plan or furniture layout. Yet those details decide whether guests arrive to a professional event or a room still being assembled. This corporate event logistics example shows how practical planning brings equipment, people, site access and timings together before event day.
Consider a fictional but realistic brief: a Central Coast business is hosting a staff and client awards evening for 180 guests in a warehouse-style venue. The event includes pre-dinner drinks, a seated meal, speeches, awards presentations and a DJ after formalities. The venue has a concrete floor, limited built-in lighting, one loading entrance and a strict 11 pm bump-out requirement.
The planner’s job is not simply to hire tables and chairs. It is to create a workable operating plan that allows every supplier to deliver, set up, work safely and pack down without disrupting guests, venue operations or one another.
Corporate Event Logistics Example: Start With the Site
Before selecting hire equipment, the organiser should inspect the venue with the event supplier, caterer and venue representative. A site visit turns assumptions into measurements and identifies constraints early, when changes are still easy to make.
For this event, the first questions are practical. Can a delivery truck access the loading point? Is there enough clear space for staging cases, furniture trolleys and kitchen equipment during setup? Which doors and corridors will guests use, and which must remain clear? Where are the power outlets, toilets, emergency exits and fire equipment?
The warehouse has a wide roller door, but it opens onto a shared service lane. Deliveries must therefore be booked in time slots rather than having all suppliers arrive at once. The venue manager also confirms that no equipment can block the emergency exit beside the bar area. That immediately rules out one proposed location for a display wall.
This step also determines whether the event needs extra infrastructure. A bare venue may require flooring to define dining areas, temporary lighting to make pathways safe, staging for presentations and a mobile kitchen unit if the catering space is inadequate. Hiring from one provider can simplify the plan because equipment dimensions, delivery timing and installation requirements are managed as a coordinated package.
Build the Event From Guest Flow Backwards
A room plan should follow the guest experience, not just fit the maximum number of tables onto the floor. For 180 guests, the organiser needs to allow room for registration, pre-dinner drinks, dining, service paths, a stage, audiovisual sightlines and access to exits.
Guests arrive at 5.30 pm, so the entry needs a clear registration point with a table, signage and enough space for short queues. From there, they move into a drinks area with bar tables and stools. This keeps early arrivals comfortable while final checks are completed in the dining space.
For dinner, the organiser chooses round tables of 10 with quality chairs, allowing space between settings for staff service. The stage sits at one end of the room, raised enough for guests at the back to see presenters. Tiered seating is not necessary in this case, but it may be the better option for a larger audience, a product launch or a presentation-led conference.
The DJ is positioned away from the dining tables but close enough to use the same stage area after awards. This avoids moving major equipment while guests are present. Lighting is planned in zones: warm general lighting for dinner, brighter task lighting for registration and bar areas, and controlled stage lighting for speeches and awards photos.
Set a Delivery and Setup Schedule
Good logistics depends on timings that reflect the actual work required. A delivery schedule should include access, unloading, installation, testing, supplier handovers and contingency time. Simply writing “setup from 9 am” is not enough when several teams need the same loading point.
In this example, the venue is available from 8 am. Flooring and larger infrastructure arrive first because other equipment will sit on or around them. Tables, chairs and bar furniture follow. Staging, screens and lighting are installed once the room footprint is confirmed. The caterer enters after furniture placement, bringing in food, service equipment and any mobile kitchen items needed.
A workable schedule might allow:
- 8.00 am: venue access, safety check and floor protection installed
- 8.30 am: flooring, staging and major hire equipment delivered
- 10.30 am: tables, chairs, bar furniture and display units positioned
- 12.00 pm: lighting, screen and presentation equipment installed and tested
- 1.30 pm: catering setup and bar delivery
- 3.30 pm: styling, signage and registration area completed
- 4.30 pm: full room check, sound check and supplier briefing
- 5.15 pm: doors, access routes and guest areas cleared for arrival
The exact order will vary. A hotel ballroom with direct lift access needs a different plan from an outdoor awards night under a marquee. The principle is the same: install large, structural items first, then build the guest environment around them.
Plan Power, Safety and Weather Early
Power is one of the most common weak points in temporary event setups. The organiser needs a clear list of what requires electricity, including lighting, screens, sound equipment, catering appliances, refrigeration and DJ gear. Checking the number and location of outlets is only the start. The venue’s available load must support the equipment being used.
In the warehouse scenario, the caterer’s ovens and refrigeration cannot share a circuit with the stage lighting and audiovisual equipment. Separate power allocation is arranged before delivery. Cables are routed away from guest paths or protected with suitable covers where crossing is unavoidable.
Safety planning also includes stable staging, clear exits, adequate lighting around steps, secure placement of screens and furniture that does not create pinch points in busy areas. If alcohol is served, the event team should make sure service areas do not obstruct entry and exit routes.
For outdoor corporate events, weather becomes a major logistics item rather than a last-minute concern. A marquee, weighted structures, flooring, umbrellas and an alternate wet-weather layout may all be required. Wind, rain, ground conditions and vehicle access can change what is safe and practical. A site that looks suitable in dry conditions may be difficult for delivery vehicles after heavy rain.
Assign One Person to Make Decisions Onsite
When an event has multiple suppliers, someone must be authorised to answer questions quickly. This is usually the event manager or a nominated company representative who understands the brief, budget and priorities.
For the awards evening, that person holds the final run sheet, site plan, supplier contacts and venue rules. They confirm when each delivery has arrived, inspect key setup points and resolve issues such as a delayed truck, an extra power requirement or a table layout adjustment.
This role is particularly valuable when the event changes shape during setup. Perhaps registrations are higher than expected, the client requests an additional display unit, or a speaker needs a lectern moved. A clear decision-maker prevents small changes from becoming conflicting instructions across the team.
A short onsite briefing before doors open is equally useful. The venue, caterer, audiovisual team and event support crew should know who is responsible for guest entry, presentations, emergencies, supplier access and pack-down. Everyone does not need to attend a long meeting. They do need the right information before guests arrive.
Pack-Down Is Part of the Plan
Pack-down should be planned with the same care as setup. In this example, guests leave by 10.30 pm, while equipment must be removed by 11 pm. That is a tight window, so some items need to be prepared for collection as soon as they are no longer required.
The DJ equipment and presentation screen may be removed after formalities if they are no longer in use. Bar furniture can be stacked once the final guests move to the exit area. Catering equipment is cleared according to the caterer’s schedule, while tables and chairs remain until the room is empty.
The organiser should also confirm rubbish responsibilities, venue cleaning requirements and where equipment can wait before collection. Leaving hired items exposed, unsecured or in a shared loading lane creates avoidable risk.
For a more comprehensive event, Central Coast Party Hire can coordinate hire equipment, delivery, installation and event support as part of one practical operating plan. That reduces the number of moving parts the organiser needs to chase on the day.
The strongest event logistics plan is one that looks almost invisible to guests. When access is clear, equipment is in the right place, suppliers know their timing and pack-down has already been considered, the event team can focus on the people in the room rather than the problems behind it.
Corporate Launch Event Guide for Smooth Delivery

A product launch can be undermined long before the first guest arrives. A screen that cannot be seen from the back of the room, a registration queue in the rain or insufficient power for catering can shift attention away from the announcement. This corporate launch event guide focuses on the practical infrastructure and operating decisions that keep the experience professional from arrival through to pack-down.
Start with the launch objective, not the equipment list
The equipment required for a corporate launch depends on what the event needs to achieve. A media reveal, dealer conference, staff launch and public product demonstration may all use staging and audiovisual equipment, but the guest journey, capacity and level of access will be very different.
Set the event purpose first. Decide who needs to attend, what they need to see or do, and the action you want them to take afterwards. This shapes the format. A new vehicle reveal may need a ute stage, lighting and a controlled presentation area. A consumer product launch in a shopping precinct may need display units, event flags, fencing and a practical queue system. An internal brand launch may place more weight on seating, screens, catering and clear presentation sightlines.
It is also worth confirming whether the event is primarily about content, connection or demonstration. Trying to deliver all three at full scale can strain the budget and programme. A smaller, well-managed experience with clear messaging is generally more effective than a crowded event with too many competing elements.
Build the site around guest flow
Guests notice friction immediately. They may not comment on well-positioned flooring or a correctly sized marquee, but they will remember standing in a slow queue, not knowing where to enter, or missing the key announcement because they could not see the stage.
Map the event in the order a guest experiences it: arrival, parking or drop-off, registration, welcome, main presentation, demonstrations or networking, catering, amenities and exit. For each point, identify the space needed, the equipment needed and the person responsible for it.
A simple floor plan should allow room for registration desks, accessible paths, staff circulation and service access. Avoid putting food service directly beside registration or placing a product display where it creates a bottleneck. If the launch includes a reveal, make sure guests can move into the viewing area before the programme begins rather than entering while the presentation is underway.
For outdoor and temporary sites, ground conditions matter. Flooring may be needed to create stable guest pathways, protect turf or provide a cleaner finish beneath dining and display areas. Picket fencing, event flags and signage can help define the site, but they should support wayfinding rather than create visual clutter.
Plan for weather and comfort early
On the Central Coast, a bright morning can become a wet afternoon or a warm, exposed event space. A marquee gives protection, but the right structure is about more than keeping rain off guests. Consider the number of people, airflow, sidewall requirements, flooring, lighting and the room needed for staging, catering and equipment.
Umbrellas can work well for casual networking areas and smaller outdoor activations. For formal launches, they are usually best used as a supplement to covered areas rather than the main weather plan. Allow for wet-weather entry points, safe cable management and enough shelter for guests waiting to register.
Match staging, screens and sound to the room
The moment of announcement needs to be seen and heard clearly. That sounds obvious, yet presentation infrastructure is often treated as a late addition once the venue has been selected. It should be planned alongside guest numbers and room layout.
A raised stage creates a focal point and improves sightlines, especially where seating extends beyond a few rows. The ideal height and size depend on the venue, ceiling height, presentation style and whether multiple speakers, a panel or a product display will use the space. A stage that is too high can feel disconnected in a small room; one that is too low can disappear behind standing guests.
Screen hire and lighting should be selected for the viewing distance and ambient light. Daylight, glass walls and outdoor conditions can reduce screen visibility. If video is central to the launch, test the content and playback process before doors open. Allow for a backup copy, spare presentation clicker and a defined operator who knows the running order.
Audio is equally practical. Guests at the back must hear the presenter without forcing those at the front to endure excessive volume. Microphone choices depend on the format. A lapel microphone suits a presenter who needs both hands free, while handheld microphones can be more reliable for audience questions and panel discussions. Build a soundcheck into the schedule when the room is quiet and accessible.
Use furniture and catering areas to support the format
Furniture is not simply a styling decision. It determines whether people can take notes, eat comfortably, network naturally and remain engaged during the presentation.
Theatre-style seating suits a presentation-led launch and gives strong capacity in a compact footprint. Cabaret tables support discussion and meal service, but reduce capacity and can make it harder for guests at the rear to see the screen. Cocktail furniture works for shorter launches, showroom events and networking sessions, provided there is adequate space to move between groups.
Plan catering around the programme. Serving coffee and light food before the event encourages early arrival. A post-presentation service keeps guests onsite for conversations and product demonstrations. Mobile kitchen units can be useful where venue facilities are limited, though they require early planning for power, water access, delivery routes and waste management.
Do not overlook the practical details: eskies for drinks, rubbish arrangements, service tables, back-of-house storage and room for caterers to restock without crossing the guest area. These items are rarely visible in event photos, but they protect the standard of the experience.
Confirm power, access and safety before bump-in
Many launch-day problems originate in bump-in. Equipment needs a clear delivery route, suitable loading access and enough time for installation, testing and adjustments. A city venue may have booking windows for loading docks. A park or open site may have uneven access, restricted vehicle movement or limited power supply.
Prepare a site brief covering delivery times, contacts, vehicle access, floor plans, power locations, emergency exits and any venue restrictions. If multiple suppliers are involved, coordinate the order of arrival. Flooring and marquees generally need to be in place before furniture, staging and technical equipment are installed.
Power requirements should be calculated across lighting, screens, sound, catering, refrigeration and any activation equipment. Do not assume existing venue outlets can carry the load. Temporary power, tested leads and proper cable protection may be required, particularly for outdoor events or high-demand production.
Safety planning should include weather response, crowd management, first aid, emergency access and pack-down procedures. For public-facing launches, fencing and barriers may be necessary to separate guests from service areas or demonstration zones. The appropriate level of control depends on attendance, location and the nature of the activation.
Run the event to a clear production schedule
A detailed run sheet turns a collection of suppliers into one coordinated event. It should show who is doing what, where they need to be and the timing for every key moment: bump-in, supplier arrivals, registration, guest seating, speeches, reveal cues, catering service and pack-down.
Leave contingency time before doors open. A launch rarely runs exactly to plan, and ten spare minutes can resolve a late delivery, a presentation issue or a changed seating requirement without guests seeing the pressure behind the scenes.
Assign a single event lead with authority to make operational decisions. Speakers should know where to wait, when they are on and who is controlling slides. Caterers should know when service pauses for speeches. Front-of-house staff should understand the guest list process and where to direct late arrivals. Clear roles reduce unnecessary calls and mixed instructions on the day.
Choose support that scales with the launch
Some organisations have an experienced internal events team and only need reliable hire equipment delivered on time. Others need support with site planning, equipment selection, installation, event-day coordination and clean-up. Neither approach is automatically better. The right level of support depends on the site complexity, programme risk and capacity of your team.
For launches involving temporary infrastructure, multiple guest zones or a tight production schedule, one coordinated provider can reduce handovers and simplify accountability. Central Coast Party Hire can assist with equipment and event support across the planning, setup and pack-down stages, helping organisers keep their attention on the launch itself.
The best final check is a guest-focused one: if someone arrives five minutes early, can they find the entrance, stay comfortable, understand where to go and clearly experience the announcement? If the answer is yes, the operational work is doing its job.
How Many Chairs for a Wedding? Get It Right

A wedding can look perfectly planned on paper until guests arrive and there are not enough places to sit. The answer to how many chairs for wedding celebrations is rarely just the final guest count. Ceremony seating, reception dining, accessibility, suppliers, children and the timing of your setup all affect the number you need.
The safest approach is to work from a confirmed floor plan and order for each part of the day, rather than treating chairs as one simple item. A little planning here avoids last-minute changes, crowded layouts and the more awkward problem of guests standing through formal moments.
Start with the confirmed guest list
For a seated reception, begin with one chair for every confirmed guest. If 100 people have accepted, your base requirement is 100 dining chairs. Do not subtract guests on the assumption that some will spend most of the night on the dance floor. Everyone needs a seat for meals, speeches and the formal parts of the evening.
Then allow a small buffer. For most private weddings, an additional 5 to 10 per cent is sensible, particularly where RSVP numbers are still moving, families are attending with children, or the venue has room for a little flexibility. For 100 guests, this usually means ordering 105 to 110 reception chairs.
The buffer does not need to be excessive. Too many chairs can make a marquee or function room feel cramped, restrict service paths and create unnecessary hire and transport costs. It is there to cover genuine variables, not to fill every available corner.
How many chairs for a wedding ceremony?
Ceremony numbers depend on whether every guest is expected to be seated. At a traditional ceremony, plan one chair per guest, plus a small contingency allowance. A 100-guest ceremony would normally require 105 to 110 chairs.
There are exceptions. A short, informal ceremony with a casual cocktail-style reception may only need seats for close family, older guests and anyone who cannot comfortably stand. That option can reduce chair numbers, but it needs clear communication and thoughtful placement. Guests should not discover at the ceremony that there is nowhere to sit.
Reserve a front row or two for immediate family and important guests. If seats are being held, include them in the total even if their occupants are not yet confirmed. It is also worth allowing chairs for a reader, musician or celebrant where required. These are small details, but they are often missed when the order is based solely on guest numbers.
Ceremony chairs and reception chairs are not always the same order
If the ceremony and reception are in different spaces, you will generally need separate chair quantities for both. For example, 100 guests may require 110 ceremony chairs and 110 reception chairs. While some suppliers can reposition ceremony chairs for dinner, it is only practical when there is sufficient time, labour and access between events.
Chair turnover can work well for a ceremony followed by a later reception in the same venue, especially with a professional crew managing the transition. It is less suitable where guests move directly from the ceremony to canapés, where the weather is uncertain, or where the same chairs need to be reset around tables while the space is in use. Saving on a second set of chairs can be outweighed by a rushed room change and extra operational pressure.
Work from table capacity, not guesswork
The reception layout confirms whether your chair count will physically work. Each dining table has a practical capacity based on its size, shape, linen, place settings and service style. Round tables may seat eight, 10 or 12, while trestle tables are often arranged in long runs with guests seated along both sides.
If you are planning 96 guests on 10-seat round tables, you will need 10 tables but 100 dining positions. Four seats will be empty, yet all 100 chairs still need to be supplied and placed if the tables are fully set. Alternatively, you might choose a mix of table sizes to reduce empty settings. The right decision depends on the room dimensions, desired atmosphere and whether you want a fuller look at each table.
Avoid squeezing an extra chair onto every table to reduce table numbers. Guests need space to sit, eat and move their chairs back without blocking another table or a service route. This matters even more in a marquee, where poles, walls, dance floors, catering access and emergency exits need to remain clear.
Do not forget non-dining seating
Dining chairs are the core requirement, but other parts of the event may need seating too. A lounge area can give older relatives and guests a quiet place to rest away from the dance floor. High bar tables work well for a cocktail period, but they should be balanced with enough stools or lounge seating for guests who need them.
Consider these requirements during the floor-planning stage:
- Highchairs for babies and toddlers, confirmed directly with parents
- Accessible seating positions with clear, level paths for wheelchairs and mobility aids
- A chair for the signing table, where applicable
- Seating for musicians, photographers during meal service, or other suppliers if included in your arrangements
- Bar stools for a bar or cocktail table area
Not every supplier needs a formal dining chair, and not every wedding needs a lounge zone. The point is to make these choices deliberately rather than finding gaps after the main furniture order has been delivered.
Match the chair style to the venue and format
The chair type changes the feel of the event and can affect layout. White folding chairs are a practical choice for outdoor ceremonies and can be efficiently set in neat rows. Timber chairs suit many garden, winery and rustic settings, while classic bentwood or cross-back styles can complement a more formal reception. Plastic seating may be the right operational choice for large community-style weddings or wet-weather contingencies where durability and efficient setup matter most.
Style should never override comfort or site suitability. A chair that looks right in photographs still needs to be stable on the surface beneath it. Grass, uneven ground, soft soil and sloping sites may require flooring, a levelled area or careful row placement. For longer ceremonies, ensure the selected chair is comfortable enough for the expected duration.
For an outdoor event, also consider wind, rain and the distance between delivery access and the ceremony site. Furniture that needs to be carried across a large property or beachside location requires more time and labour than an accessible venue with a level loading area.
Allow for the day’s schedule and site logistics
A chair count is only useful when it can be delivered, positioned and removed without disrupting the event. Confirm when the venue is available, whether there are stairs or narrow access points, and whether furniture must be packed down immediately after the reception. These details influence crew requirements and whether the ceremony and reception setups can share equipment.
If a wet-weather plan involves moving the ceremony under a marquee or into an indoor room, make sure that space can hold the full ceremony chair count. A backup location that only accommodates half the guests is not a workable contingency. The same applies to a reception layout that changes once a dance floor, stage, gift table or mobile bar is added.
For larger weddings, a scaled floor plan is worth the effort. It confirms table numbers, chair spacing, aisles, wheelchair access, catering routes, exits and the placement of staging or entertainment equipment before equipment arrives on site. Central Coast Party Hire can coordinate chairs, tables, flooring, marquees and event infrastructure as part of one practical setup plan, reducing the risk of separate hire decisions clashing on the day.
A reliable chair-count example
For a wedding with 120 confirmed guests, a separate ceremony and seated reception, and no chair turnover, a practical order might be 130 ceremony chairs and 130 reception chairs. The additional 10 chairs in each area allow for late confirmations, family seating adjustments and a modest operational buffer.
If the reception has 12 tables seating 10 guests each, order 120 dining chairs as the minimum. Add the 10-chair allowance if space permits. Then assess any separate seating: perhaps four stools at a bar, two chairs at a signing table and several highchairs where needed. These are counted separately so the dining layout remains accurate.
Where the same 120 guests move straight from the ceremony into a cocktail reception, you may instead choose 130 ceremony chairs, then lounge seating and a limited number of stools rather than 130 dining chairs. The right quantity follows the format of the event, not a fixed wedding rule.
The most dependable number is the one that has been checked against your final guest list, furniture layout, venue access and wet-weather plan. Confirm those four elements before locking in your hire order, and guests will have the space they need to settle in and enjoy the celebration.
How to Design Guest Seating for Any Event
A seating plan can make an event feel organised from the moment guests arrive, or create bottlenecks before the first speech begins. Knowing how to design guest seating means looking beyond chair numbers. You need to account for the event purpose, sightlines, access, catering movements, weather and the way people will use the space across the day or night.
For a private celebration, the priority may be relaxed conversation and a welcoming atmosphere. For a corporate presentation, guests need clear views of the stage and screen. At a community event or festival, capacity, safety and efficient circulation are usually the deciding factors. The best seating design starts with what guests need to do, then builds the furniture layout around it.
Start With the Event Format and Guest Count
Before choosing tables or chairs, confirm the expected attendance and how long guests will be seated. A 40-person sit-down dinner needs a different approach to a 200-person awards night, a school fete or a public concert. Include staff, speakers, performers and suppliers when assessing how the venue will operate, even if they are not part of the guest seating count.
It is sensible to plan for a small attendance buffer where numbers are still moving. For ticketed events, this may mean allowing for late registrations. For weddings and private parties, it may mean holding a few spare chairs for last-minute changes. Extra furniture is easier to manage when it is built into the layout rather than squeezed into an aisle on the day.
Think about the event flow as well. Guests may need seating for a ceremony, then move to dining tables. They might attend a conference session before breaking into smaller discussion areas. A flexible setup can reduce the amount of furniture required, but only if there is enough time and labour available to reset the space between sessions.
Choose a Layout That Supports the Purpose
The right layout is practical first. It should help guests see, hear, eat, talk or participate without competing with service access and safety requirements.
Theatre seating for presentations and performances
Theatre-style seating uses rows of chairs facing a focal point such as a stage, lectern, screen or mobile truck stage. It is an efficient option for conferences, ceremonies, school assemblies, product launches and entertainment. Allow clear aisles so guests can enter and exit without climbing across a full row of chairs.
For larger audiences, tiered seating can improve views from the back and create a more professional presentation area. It is particularly useful where the ground is flat but the audience needs an uninterrupted view of performers, sporting activity or a large screen. The trade-off is that tiered seating requires careful positioning, stable ground and managed access.
Cabaret and banquet layouts for dining and discussion
Round tables work well for weddings, gala dinners and celebrations because they encourage conversation. Rectangular tables can be more space-efficient and suit long shared dining arrangements, workshops and community meals. Cabaret-style tables, where one side is left open toward the stage, are useful for corporate functions that combine a meal with presentations.
Do not focus only on fitting the maximum number of tables into a marquee or venue. Guests need room to pull chairs out, servers need a clear path, and organisers need access to the stage, bar, catering area and amenities. A tighter layout may increase capacity, but it can quickly make a formal event feel crowded.
Lounge seating for informal events
Lounge furniture, wine barrels, bar tables and umbrellas create casual spaces where guests can meet without committing to a formal table. This approach suits cocktail functions, outdoor celebrations, trade events and festival hospitality areas. It also gives older guests, families and people who do not want to stand for long a comfortable place to take a break.
Informal seating still needs structure. Position lounge areas away from main entry points and service lanes, and avoid creating dead ends where guests become trapped during busy periods. Use lighting and flooring to define the area, particularly for evening events.
Plan Space Around the Chairs, Not Just the Chairs
A layout that looks generous on paper can fail if it ignores the working space around each seat. Start by marking fixed elements: doors, emergency exits, power access, columns, trees, toilets, bar locations, catering tents and the stage. These features determine where seating cannot go.
Then allow room for circulation. Guests should be able to reach their seats without cutting through service areas, and staff should be able to carry food, clear tables or manage equipment without weaving through tightly packed chairs. Main pathways should be obvious and kept clear throughout the event.
Where food and drinks are served, place tables so spills, plates and glassware do not need to travel through the busiest crowd areas. Where a stage or screen is used, keep a practical gap between the front row and the performance area. This allows presenters, photographers, technicians and event staff to work safely while giving guests a comfortable viewing distance.
Outdoor events need additional allowances. Grass can become soft after rain, uneven ground can affect chair stability, and afternoon sun may make one side of the seating area unusable. Marquees, flooring, umbrellas and appropriately positioned lighting help make the layout more dependable in changing conditions.
Build Access and Comfort Into the Seating Plan
Good guest seating is inclusive seating. Consider wheelchair access, mobility aids, prams and guests who need a clear, level route from parking or drop-off areas. Accessible positions should not be an afterthought placed at the edge of the event. They should offer the same view, comfort and participation as other guest areas.
Leave spaces that can accommodate wheelchairs without blocking aisles. Provide a mix of seating types where possible, particularly at longer events. Chairs with supportive backs suit ceremonies, dining and conferences, while casual lounge options can provide relief during an all-day public event.
Temperature, shade and visibility matter just as much as the chair itself. Under a marquee, confirm ventilation and lighting. Outdoors, plan for sun direction at the actual event time, not only when the site is inspected. If speeches run into the evening, guests need enough light to move safely while the stage remains the visual focus.
Acoustics are another common issue. A guest seated behind a speaker tower or beside a noisy catering area may have a poor experience regardless of how attractive the layout looks. Keep speakers, generators and operational equipment away from seating where practical, and test the sound from the rear and side sections before doors open.
Match Furniture to the Venue and Event Standard
Furniture should suit both the venue conditions and the event expectation. Plastic chairs may be a sensible choice for a large school or community event where fast setup and easy cleaning are priorities. Timber, upholstered or dressed chairs can better suit a wedding ceremony or formal dinner. The same applies to tables, linen, lighting and flooring.
Consistency helps the event look planned rather than assembled. Use matching chair styles within key areas, choose table sizes that work with the room dimensions, and ensure the stage, screen and furniture are visually aligned. This does not mean every zone needs identical furniture. A corporate dinner can use formal dining chairs at tables and relaxed bar seating near the networking area, provided each zone has a clear purpose.
For larger public events, durability and operational practicality should lead the decision. Equipment needs to handle repeated use, changing weather and a steady volume of guests. In these settings, clear layouts, reliable infrastructure and safe access are more valuable than decorative details that restrict movement.
Confirm Setup, Reset and Pack-Down Requirements
A seating plan is only useful if it can be installed safely and on time. Check delivery access for trucks and utes, loading times, surface conditions and any venue restrictions before finalising furniture quantities. Some sites have limited access windows, narrow gates or strict noise requirements that affect when setup can begin.
If the event includes a room reset, map out who moves each item and where the furniture will go while the next layout is prepared. A ceremony-to-reception changeover, for example, may require chairs to be moved quickly while guests are occupied elsewhere. Planning this in advance prevents staff from making rushed decisions in front of guests.
Central Coast Party Hire can coordinate chairs, tables, marquees, flooring, staging, lighting and event support as part of one practical site plan. Using one coordinated supplier helps reduce gaps between furniture, infrastructure and the people responsible for setup.
The strongest seating designs are rarely the most crowded or complicated. They give every guest a clear place to sit, a safe way to move and a reason to stay comfortable long enough to enjoy the event.